

Upgrade Your Dermatology Scope with Camera Support for Better Training

A dermatology microscope can do excellent work for years, then slowly stop fitting the way the practice works. The optics may still be serviceable, but teaching through one pair of eyepieces becomes awkward. Documentation takes extra steps. New staff members have to wait their turn to see a finding that should be easy to share.
That was the situation for a dermatology customer who wanted to move beyond a current scope and add camera support for training. The goal was not just to buy a newer instrument. The goal was to make routine viewing, teaching, and shared review easier inside a busy dermatology business.
This article is informational only and does not replace clinical, diagnostic, or equipment-specific guidance.

Why camera support changes the training experience
A traditional binocular microscope works well for individual viewing. One person looks, adjusts focus, and interprets what they see. That setup can become limiting when another clinician, technician, student, or trainee needs to see the same field at the same time.
Camera support solves that problem by turning the microscope into a shared learning tool. With the right camera and display setup, a trainer can show the field of view on a monitor while still using the microscope. That makes it easier to point out structures, compare fields, and talk through observations without constant switching.
For dermatology practices, this can help with:
Staff training
New team members can learn what to look for while viewing the same live image as the trainer.
Internal review
A provider can share a finding with another team member without moving everyone to the eyepieces.
Documentation support
Camera systems may help capture images for training records, internal education, or case discussion, depending on the practice’s policies and equipment.
Workflow consistency
A shared screen can reduce the back-and-forth that happens when only one person can view the sample at a time.
The camera does not replace a quality optical system. It adds another way to view and teach from that system.
Start with the microscope body, not the camera
When a practice thinks about adding a camera, it is easy to focus on megapixels first. That matters, but it should not be the first question.
The bigger question is whether the microscope itself is ready for imaging. Many camera-ready scopes use a trinocular head, which includes two eyepieces plus a third vertical port for a camera. This setup lets the user view through the eyepieces while directing light to the camera.
Some existing microscopes can accept an adapter. Others may not be practical to convert. In those cases, a full upgrade may make more sense than trying to force camera hardware onto a scope that was never built for it.
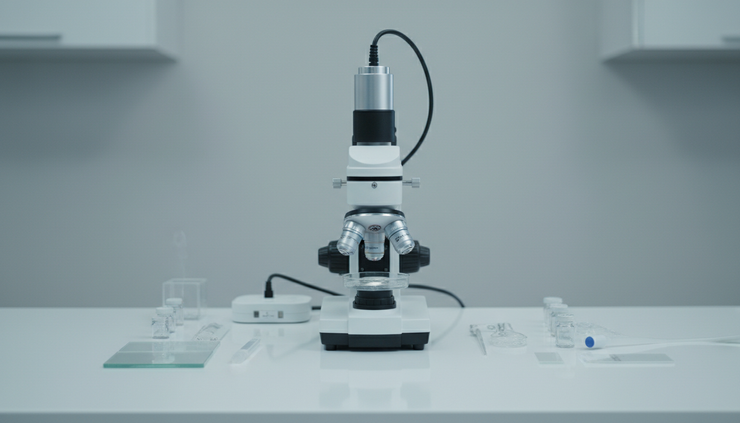
Before selecting a camera, review the main body features:
Feature | Why it matters |
Trinocular head | Provides a dedicated camera path for live viewing or image capture. |
Stable stage | Helps keep slides steady during teaching and review. |
Smooth focus controls | Makes it easier to maintain a clear image while others watch on screen. |
Quality objectives | The image on the monitor starts with the optical quality at the microscope. |
Lighting control | Consistent illumination helps the camera produce a clearer image. |
A camera can only capture the image the microscope delivers. If the optics are poor, the camera will not fix the problem.
Match the setup to how training actually happens
A dermatology practice may use a camera-supported scope in different ways. One clinic might need live display for short staff training sessions. Another might want to capture images for reference materials. A larger practice may need a setup that several users can learn quickly.
That is why Blais Microscope Company starts by looking at the real use case. A good recommendation depends on how the microscope will be used day to day.
Useful questions include:
Will the camera be used mainly for live viewing, image capture, or both?
Does the practice need a monitor, computer connection, or direct HDMI display?
How often will users switch between eyepiece viewing and camera viewing?
Will the microscope stay in one room, or does it need to move?
Are multiple staff members expected to operate it?
For live training, ease of use matters. A system that takes too long to start, focus, or display can frustrate users. For image capture, software compatibility and file handling may matter more. For shared viewing, a good monitor connection may have more impact than a higher camera spec.
The right dermatology scope is the one that fits the workflow, not just the one with the longest feature list.
What to check before Upgrading Microscopes
Upgrading Microscopes should be a careful equipment decision, especially when the new system will support training. The best place to start is a clear review of what works now and what does not.

Look at the current scope first. Is the image still sharp? Do the focus controls feel smooth? Is the illumination even? Are the objectives appropriate for the work being done? If the answer is yes, a camera adaptation may be possible. If several parts are worn or limiting, a new microscope may save time and frustration.
Next, think about the camera path. A common mistake is choosing a camera before confirming the adapter, port, sensor match, and display method. A good supplier can help sort those details before money is spent.
Then check user comfort. The microscope should support long viewing sessions without awkward posture. Training often takes longer than routine viewing, so ergonomics matter. Eyepiece height, head angle, focus knob placement, and stage movement can all affect daily use.
Finally, plan for setup and support. Dermatology teams need equipment that works when needed. Buying from a company that understands microscopes, cameras, adapters, and service can make the difference between a useful training tool and a box of mismatched parts.
How Blais Microscope Company can help
Blais Microscope Company helps customers find microscope systems that fit the work, the space, and the training need. For a dermatology business, that may mean recommending a new camera-ready scope, matching a camera to an existing trinocular microscope, or helping compare practical options before a purchase.
That guidance can include:
Reviewing the current microscope and upgrade path
Explaining camera connection options in plain language
Matching microscope features to dermatology workflow
Supporting training-focused setups
Helping avoid incompatible adapter and camera combinations
A newer microscope with camera support should make the job easier. It should not add confusion, extra steps, or equipment that no one wants to use.

A better scope can make training more consistent
A microscope upgrade is not only about sharper optics or newer hardware. For a dermatology practice, the real value comes from better shared viewing, easier teaching, and a system that supports the way the team learns.
Camera support can turn a single-user instrument into a training tool. The right microscope body, camera, adapter, and display method all work together. When those pieces are matched correctly, training becomes easier to repeat and easier to understand.
Blais Microscope Company can help identify a dermatology business scope that fits the current need and leaves room for practical use over time. If the current microscope is limiting training, now is a good time to review the setup and choose equipment built for the way the practice actually works.


Comments